QloApps
10915Free and Open Source Hotel Management System
#CMS #Live Demo #Screenshots
2025-03-02
2025-04-08
Live Demo
Try out QloApps via the live demo.
Username : [email protected]
Password : demodemo
Getting Started
- Create a folder and move to it
mkdir qloapps && cd qloapps - Create a
docker-compose.ymlfile and add the following content:docker-compose.ymlservices: qloapps: container_name: qloapps image: webkul/qloapps_docker:latest restart: always ports: - 9090:80 environment: - USER_PASSWORD=qloappsuserpassword - MYSQL_DATABASE=qloapps qloapps_db: container_name: qloapps_db image: mysql:5.7 restart: always environment: - MYSQL_DATABASE=qloapps - MYSQL_ALLOW_EMPTY_PASSWORD=true volumes: - qloapps_db:/var/lib/mysql volumes: qloapps_db: - Start the service using docker compose.
docker compose up -d - Wait a minute for the containers to start up, then visit http://localhost:9090 to access the QloApps.
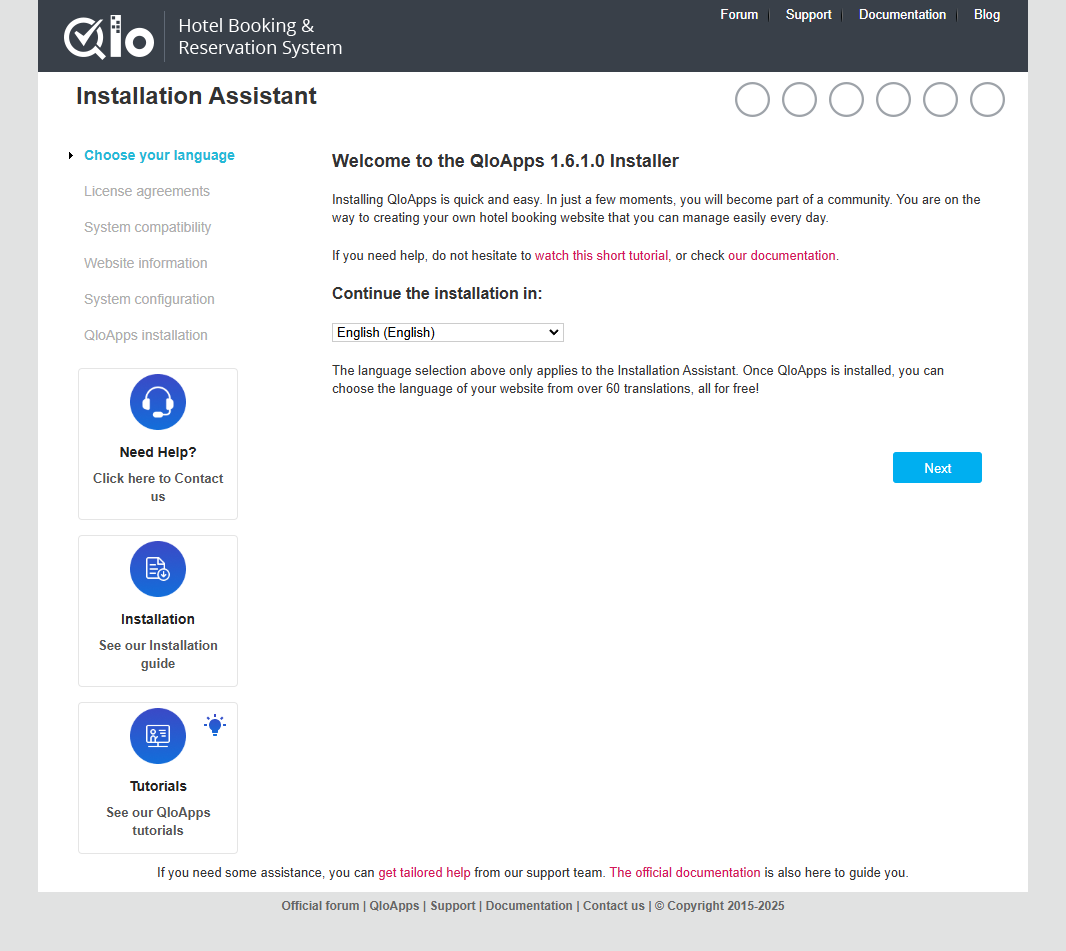
Install QloApps
Once you've accessed the installation page, follow these steps to complete the setup:
- Choose your preferred language from the dropdown menu
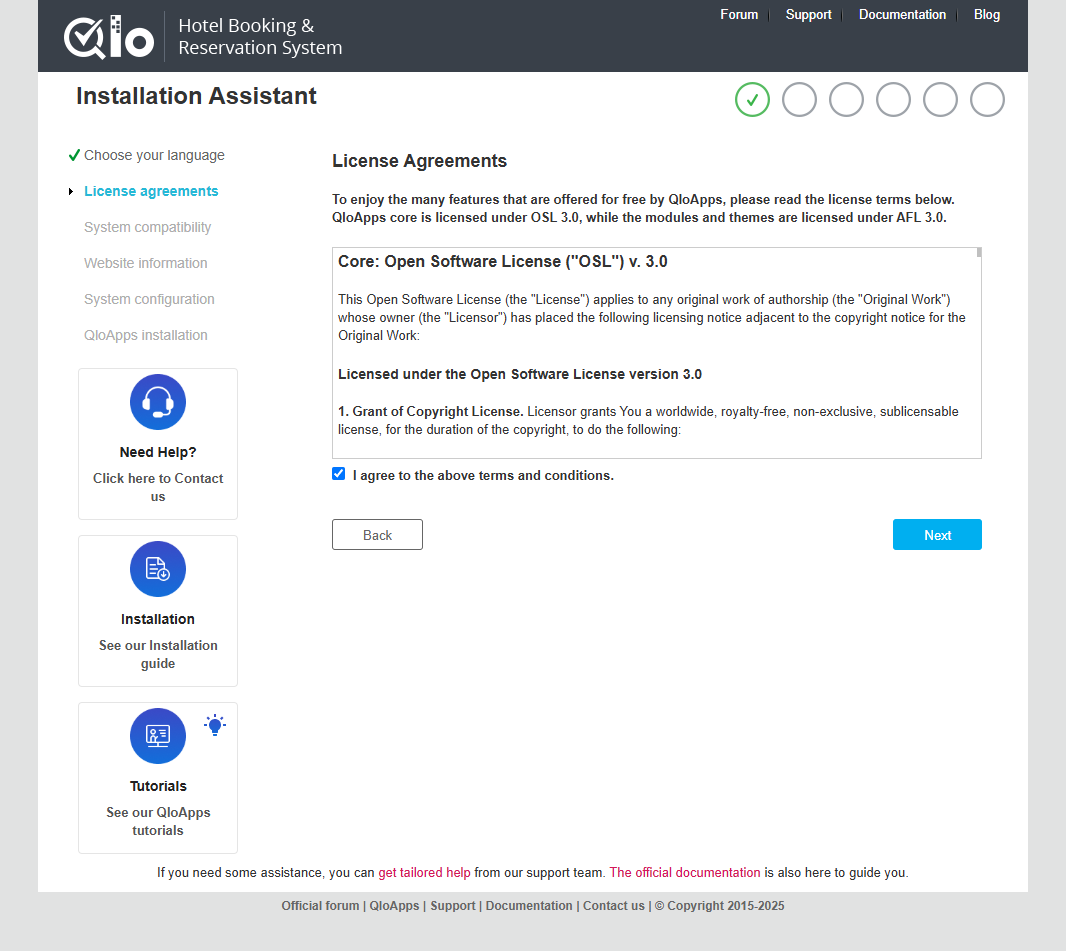
- Read and accept the license agreement to proceed
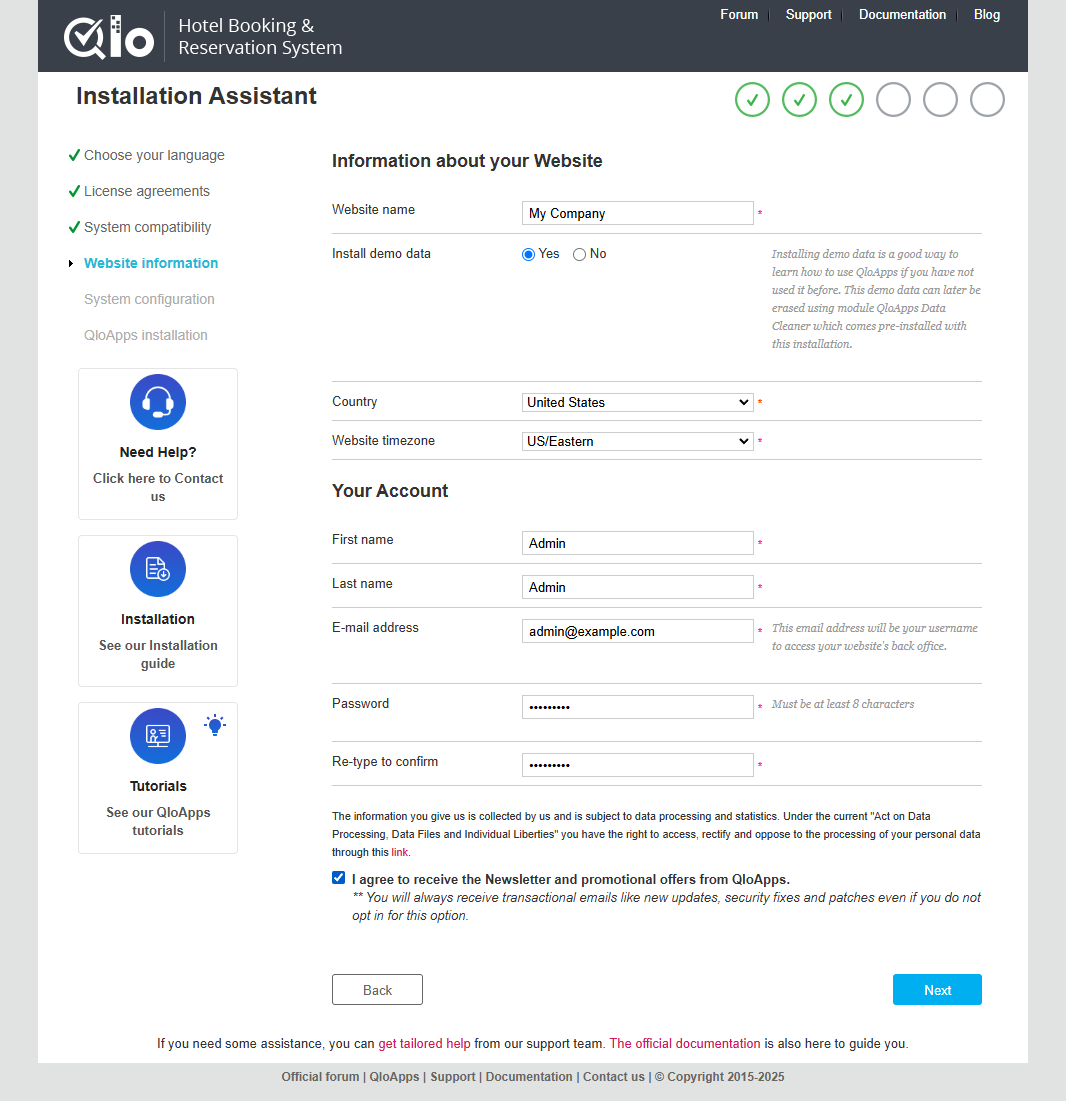
- Set up your shop information and admin account
- Enter your website name
- Create your admin account credentials
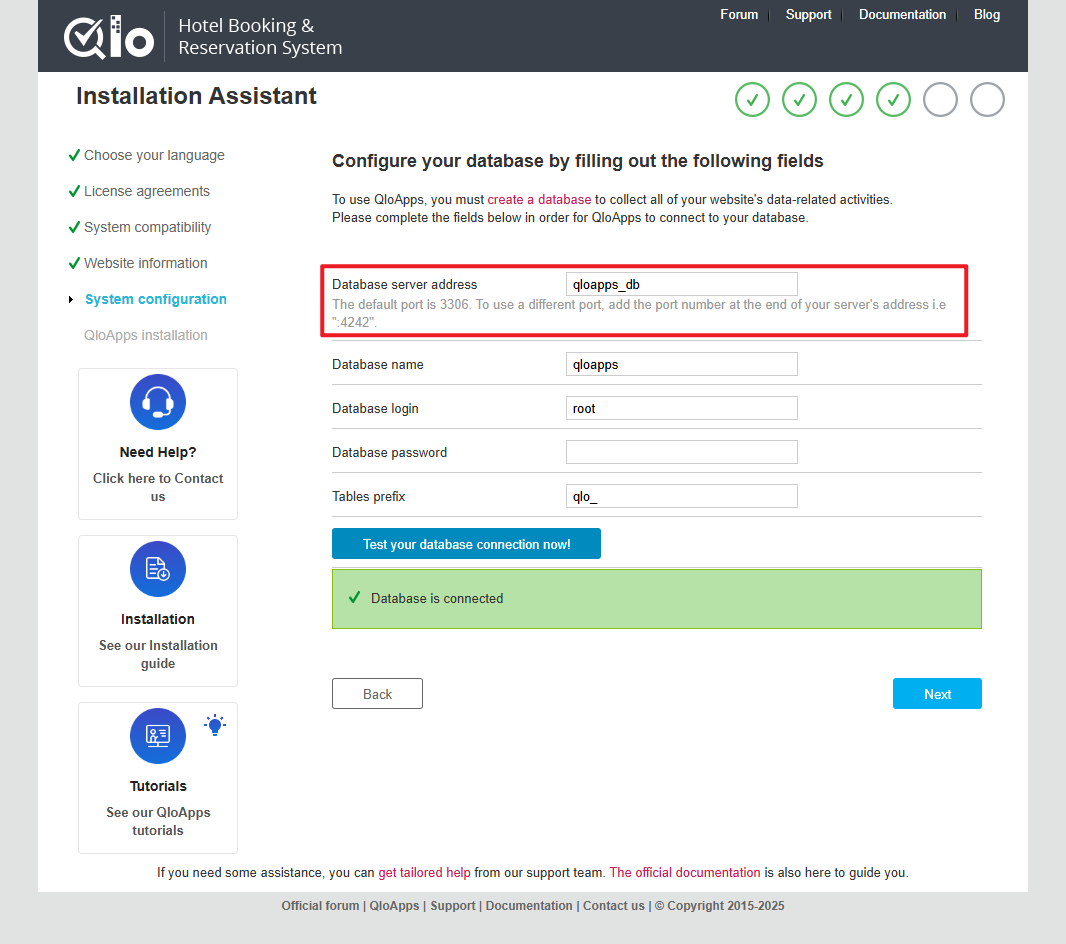
- Configure the database connection
- Enter
qloapps_dbas the database server address - Leave all other fields with their default values
- Click 'Test your database connection now!' to verify
- If successful, click 'Next' to proceed
- Enter
- After installation completes, run this command to clean up and secure your installation:
docker exec -it qloapps sh -c "rm -rf install && mv ./admin ./admindemo" - You can now access your QloApps installation:
- Frontend: http://localhost:9090
- Admin Panel: http://localhost:9090/admindemo